In today’s world of streaming, gaming, and smart home integration, Connect Hisense TV to Wi-Fi is one of the first and most essential steps for unlocking its full potential. When your TV is online, you get access to apps like Netflix, YouTube, Hulu, and firmware updates that keep your system up to date. In this guide, I’ll walk you through the process from start to finish, help you troubleshoot common problems, and answer FAQs so you can enjoy seamless connectivity.
Why Connecting to Wi-Fi Matters
Your Hisense smart TV is not just a display device. Once connected:
You can stream movies and shows directly without needing external boxes.
Firmware and software updates are delivered over the internet to improve stability, fix bugs, and add new features.
You gain access to app stores or built-in apps, allowing installation of streaming services.
You can cast or mirror content from your mobile devices, computer, or tablets to the TV.
You can integrate the TV into your smart home ecosystem (if it supports voice assistants or smart features).
So, making sure your TV is properly connected to Wi-Fi is foundational.
What You’ll Need Before You Start
Before diving into the steps, ensure you have:
A working Wi-Fi network (router or modem with wireless signal).
The SSID (Wi-Fi name) and password (network key).
A Hisense smart TV with built-in Wi-Fi or a supported external Wi-Fi adapter (if it does not have built-in Wi-Fi).
Your remote control (so you can navigate settings).
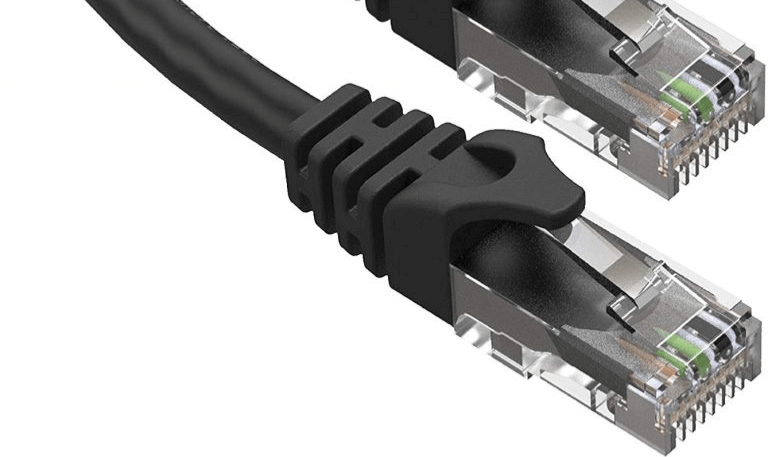
(Optional) Ethernet cable useful for direct wired connection if Wi-Fi fails or is weak.
With those ready, let’s move into the step-by-step instructions.
Read More: NFLBite on Roku
Step-by-Step: Connecting Hisense TV to Wi-Fi
Below is a general process. Variation may occur depending on your Hisense model or firmware version.
Step 1: Turn On the TV and Access the Menu
Power on your Hisense TV using the remote or the power button.
Wait for the TV to boot to the home screen or launcher.
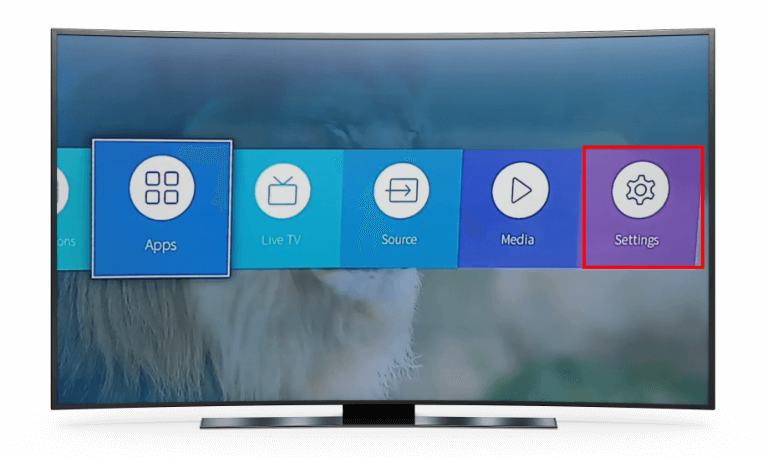
Use the remote to press the settings button. This might be labeled as “Settings,” a gear icon, or “Menu,” depending on the remote.
Step 2: Navigate to Network / Network Settings
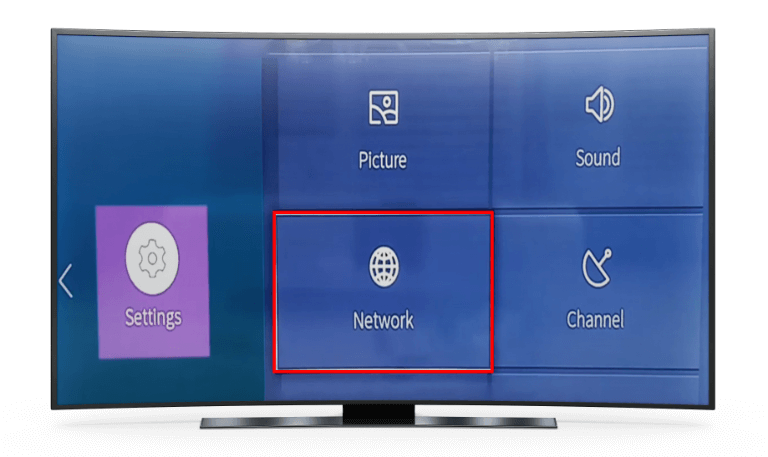
In the Settings menu, find Network or Network Settings.

On some models, you may find it under System or General settings.

In the Network section, you should see options such as “Wireless,” “Wi-Fi,” “Wired (Ethernet),” or “Network Setup.”
Step 3: Choose Wireless / Wi-Fi
Select Wireless or Wi-Fi (not “Wired”).
The TV should scan for available wireless networks (SSIDs).
Wait as the list populates.
Step 4: Select Your Wi-Fi Network
From the list of detected Wi-Fi networks, find and highlight your SSID (your home Wi-Fi name).
Press the OK/Enter button on the remote to select it.
Step 5: Enter Password
After selecting your network, the TV will prompt you to enter the Wi-Fi password.
Using the on-screen keyboard or remote directional keys, input the correct password (case sensitive).
Double-check each character for accuracy.
Select “Connect” or press OK.
Step 6: Wait for Connection
The TV will attempt to connect. This may take a few seconds.
If successful, you should see a confirmation message like “Connected” or “Connected to Internet.”
The Network menu may show signal strength, IP address, and network status.
Step 7: Test the Connection (Optional but Recommended)

Many Hisense TVs include a “Network Test” or “Test Connection” option in the same Network menu.
Run the test to verify that the TV can reach the internet (you’ll get success or failure).
If success, then your TV is online and ready. If failure, you’ll need to troubleshoot (see later section).
Step 8: Update Firmware / Software (Optional but Helpful)
Go to Settings ➜ System ➜ Software Update (or similar menu).
If an update is available, download and install it.
A software update can resolve connection issues or improve Wi-Fi stability.
Alternative: Connecting via Ethernet Cable
If Wi-Fi is weak or unstable, or if your model lacks Wi-Fi capabilities, a wired connection is often more reliable.
Grab an Ethernet cable from your router to your TV.
On your TV, go to Settings ➜ Network ➜ Wired (Ethernet) or Network Settings.
Select the wired connection option. The TV should automatically detect and use the wired network.
After connection, you can run the network test to confirm internet access.
Troubleshooting Common Issues
Even when you follow the steps, things may not always go smoothly. Here are frequent problems and how to fix them:
Problem: “Unable to Connect” or “Authentication Failed”
Double-check you typed the correct Wi-Fi password (watch uppercase/lowercase).
If your router uses a special character in the password, ensure the TV supports that character set.
Move your TV or router closer to reduce interference or obstacles (walls, metal).
Sometimes rebooting the router helps (turn off, wait 10 seconds, turn on again).
Make sure your router’s wireless mode (e.g. WPA2) is supported by the TV. If your router is set to a newer mode (WPA3), fallback to WPA2 if possible.
Problem: TV Doesn’t Show Any Wi-Fi Networks
Make sure your Wi-Fi is turned on in the router.
Check that the router’s SSID is not hidden. If hidden, use the “Add Network” or “Hidden Network” option on the TV and manually input the SSID and security type.
Ensure the TV’s Wi-Fi radio is enabled (some settings let you disable wireless).
Reboot both the TV and router.
Problem: Weak Signal or Frequent Drops
Move router or TV so that there are fewer obstacles (thick walls, metal).
Use 2.4 GHz band instead of 5 GHz if the distance is far (2.4 GHz travels farther).
Use a Wi-Fi range extender or mesh network to improve coverage.
Make sure no other appliances or electronics are too close to cause interference (microwaves, cordless phones, etc.).
Update router firmware and TV firmware to latest versions.
Problem: TV Connected, but No Internet Access
Run the network test on the TV to see where the issue lies.
Check if other devices (phone, laptop) can access Wi-Fi. If they can’t, the issue is your internet or router.
Reboot the router and modem.
Check DNS settings (if accessible) or reset to default.
Try setting a static IP and DNS manually if all else fails.
Problem: App Doesn’t Work Despite Connection
Update the app or the TV firmware.
Clear app cache or reinstall the app via the TV’s app store (if possible).
Check regional restrictions or content licensing issues.
Ensure the TV’s date/time is set correctly incorrect time can mess with secure connections.
Problem: TV Keeps Forgetting Wi-Fi
Disable “Power saving” or “Eco mode” that may turn off Wi-Fi when idle.
Make sure router is not limiting the number of connected clients and dropping reconnection.
Use static IP assignment or router DHCP reservation to ensure stable addressing.
Ensure firmware is updated.
Problem: Hidden SSID or No SSID Broadcast
Use “Add Network” or “Hidden Network” menu option.
Manually enter SSID, select security type (WPA2, WPA), and input password.
Confirm settings and connect.
Read More: ONN TV Remote Codes
Tips for Better Wi-Fi Connection with Hisense TV
Use the 5 GHz band if your TV and router support it, and the signal is strong in range (less interference, higher speeds).
Use a Wi-Fi channel with less interference (manual channel selection) if the router allows.
Use QoS (Quality of Service) on your router to prioritize streaming devices.
Keep router firmware and TV software up to date.
Restart your TV and router occasionally to keep connection fresh.
Position the router and TV so there is clear line of sight as much as possible.
Disable unused network devices or limit heavy bandwidth usage while streaming.
Use a mesh Wi-Fi system if you have a large house with dead zones.
If possible, use Ethernet for demanding streaming or gaming.
Connect Hisense TV to Wi-Fi FAQs
Q: Why doesn’t my Hisense TV detect any Wi-Fi networks?
If your TV doesn’t show Wi-Fi networks, the wireless radio may be disabled, or the router might not be broadcasting. Check that the router’s SSID broadcast is enabled, ensure the TV’s wireless function is on, and reboot both devices. In some models you may need to use a “Scan” or “Refresh” option to find new networks.
Q: What types of wireless security does Hisense TV support?
Most Hisense TVs support common security protocols like WEP, WPA, WPA2. Some newer models may support WPA3 as well, but older models may struggle with advanced encryption. If your router is set to an unsupported mode, switch to WPA2 (AES) to ensure compatibility.
Q: Can I connect Hisense TV to 5 GHz Wi-Fi?
Yes, if both the TV and your router support 5 GHz band, you can connect using it. The advantage is faster speeds and less interference. However, 5 GHz has shorter range than 2.4 GHz, so signal strength may suffer in distant rooms.
Q: My TV says “Connected” but apps won’t load. Why?
This means the TV is connected to the network but cannot access the wider internet. The issue may lie with the router, ISP, DNS settings, or app servers. Run the network test on the TV, reboot your router, and check that other devices can connect to the internet.
Q: Is it better to use Ethernet instead of Wi-Fi?
Yes, a wired (Ethernet) connection is usually more stable and delivers faster, more consistent speeds. It’s less vulnerable to interference and signal dropouts, making it ideal for streaming 4K, gaming, or using bandwidth-intensive features.
Q: How do I connect if my SSID is hidden (not broadcast)?
Use the TV’s “Add Network” or “Hidden Network” function. You’ll need to manually input the SSID name exactly, choose the correct security type (WPA/WPA2), and enter the password. Then confirm and connect.
Q: The TV keeps dropping connection occasionally. What should I do?
First, check signal strength and see if the router is far or blocked by obstacles. Update firmware on both TV and router. Use 2.4 GHz if 5 GHz is unstable. Consider router settings like DHCP lease time or maximum client limits. A Wi-Fi extender or mesh system may help.
Q: Can I assign a static IP address to the TV?
Yes, if your router supports static IP or IP reservation, you can assign a fixed address. This can prevent DHCP conflicts and improve stability. On the TV, you would go into advanced network settings and input the IP address, subnet mask, gateway, and DNS manually.
Q: How do I update the firmware if I’m not connected yet?
If the TV is not yet connected, you might download the firmware file from Hisense’s official website using a computer and then transfer it to a USB drive. Plug the USB into your TV and use the Update via USB option in Settings ➜ System ➜ Software Update.
Q: Will my Hisense TV remember the Wi-Fi after a power outage?
Yes, under normal operation, the TV retains the Wi-Fi configuration even after power cycles. But if a “factory reset” or “clear network settings” is performed, the stored Wi-Fi info is erased and you’ll need to reconfigure it.
Conclusion

Connecting your Hisense TV to Wi-Fi is a vital step to unlock its smart features, from streaming your favorite shows to receiving software updates. Start by entering your network settings, selecting the wireless option, choosing your SSID, entering your password, and waiting for the connection to establish. If Wi-Fi is weak or unavailable, using an Ethernet cable can provide better performance.
Be ready to troubleshoot issues like authentication errors, signal dropouts, or failure to detect networks. Use firmware updates, adjust router settings, reposition your devices, or opt for network extensions when needed. By following this guide, you’ll ensure your Hisense TV stays online and stable, making your viewing experience smoother and more enjoyable.
Pillar Post:

![How to Fix Hisense TV Black Screen Issue [2025 Guide] 15 How to Fix Hisense TV Black Screen Issue [2025 Guide]](https://smarttvstream.com/wp-content/uploads/2025/10/How-to-Fix-Hisense-TV-Black-Screen-Issue-2025-Guide-4.png)

